Repost: ACES - what you need to know

Repost: ACES - what you need to know

October 25, 2012

Finally, a real guide to ACES. 

via Quantel >>>

aces.jpg

The Academy Color Encoding Specification (ACES) is an initiative from the Academy of Motion Picture Arts and Sciences (AMPAS) that delivers a standard, future-proof color space. ACES enables consistent color rendition in pipelines including any combination of ACES compliant cameras, processing and display devices both now and in the future.

This document introduces ACES and details how Pablo supports ACES and integrates into ACES pipelines.

The need for ACES

Until recently moving a project between facilities often resulted in color changes caused by different display devices or even a number of the same devices calibrated differently. Also a creative look developed in a project would view differently when played on new display devices. This is a fact of life in many workflows today and results in much time and effort spent to cope with these color issues.

Additionally there are new display devices appearing all the time. Flat panels, projectors and laser imaging devices all have different colorimetric properties and the list keeps growing. Program producers quite correctly want to future-proof their projects and retain their artistic vision on any future display device.

ACES is designed to eliminate these issues making high-end post more efficient today and allowing easier use of content in the future on new display devices.

Enter ACES

At the core of ACES is the concept of a universal RGB color space with a wide dynamic range. The ACES color space has the following properties:

R, G and B have specific colorimetric values that exceed the human visible range •Colors are saved as intensity values (scene referred brightness) - no gamma or log is pre-applied

A high dynamic range for brightness – more than film or digital can provide today • All inputs are coded to fit correctly into this space so all cameras pointing at a scene should give the same ACES images

Color values are held at high precision as 16-bit data

READ THE REST >>>

Update

on 2012-10-25 18:34 by Ben Cain

Now if Quantel would release a similar guide to DCI-P3...

A Video Workflow for the RED

A Video Workflow for the RED

October 21, 2012

Despite rather infrequent posting, I still really enjoy writing this blog. It's something I do purely for my own desire to arrive at a more in-depth understanding of the problems we encounter in the field. Lately I've had very little time for this project combined with an ever expanding list of topics I'd like to cover. Moving into the new year, something I've been wanting to do is to open this site up to other writers who have ideas for pertinent, appropriate content. Interested? Let me know. 

My first guest writer is Tom Wong, a Local 600 DIT working here on the east coast. He recently engineered a short film I produced with Kea Alcock and Zina Brown where he utilized a newly available on-set workflow for the EPIC camera which I'm excited about. My preferred way of working as an on-set colorist relies heavily on the immediacy of video where everyone on the set sees an image that will be reflected in dailies. Because of the post-centric workflow of the RED, this is not something that could be easily achieved until now. By using the software combination of LiveGrade and Scratch Lab, it's finally feasible to work in a more traditional, "video style" color correction workflow for the EPIC. For those who like to work this way, this is great. The advantage being that the Director of Photography can now make color decisions with the DIT as they are lighting and composing shots instead of taking the time, usually at the end of the day, to set the look for dailies before files are processed. 

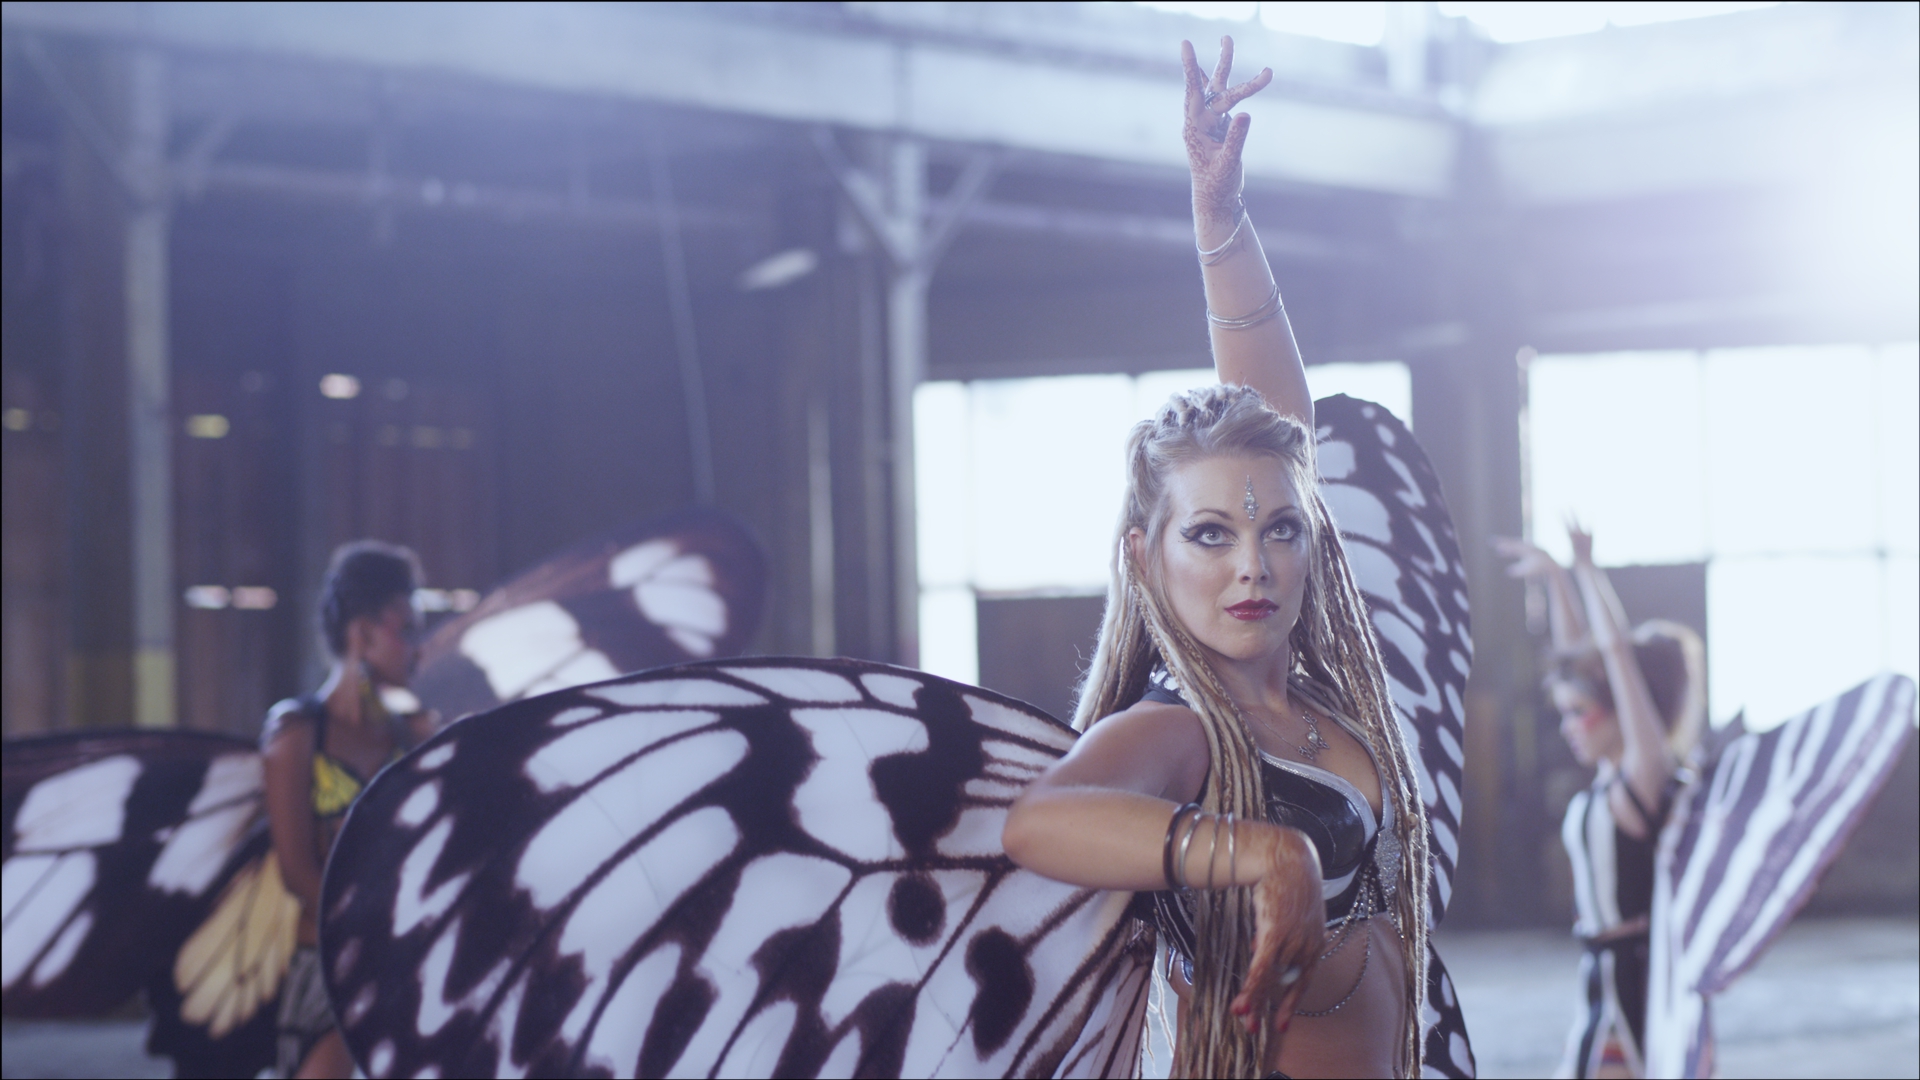
Thanks to director, Zina Brown, for letting me share images from his new film, Dreams of the Last Butterflies.

RED WORKFLOW

When doing looks with r3d files, we light the scene ideally with the subjects in there, create a test clip, put it to the computer and then apply color work on it. You can judge the exposure from there, or use the built in camera tools, then apply your look, get it approved, and then start applying that to the rest of the clips and do match from there.  You can do your looks via Redcine X Pro, third party software like Scratch Lab, Da Vinci Resolve, Colorfront OSD/EXD, etc. Generally, you have access for metadata controls for the RAW to baseline your look, before you apply RGB alterations to it. This can produce cleaner, better results when working with r3d because you aren’t jumping into forcing the values.

LIVE GRADING WORKFLOW

With a camera like the Alexa, or anything similar where you are dealing with a "baked" RGB acquistion format in Log, you output a log signal from the camera, monitor that, paint that image using software/hardware. So it goes Log from camera to your cart, LUT, and you then output it back out from your cart to whoever needs it. You save your looks as CDL or 3DLUT, and this color correction data is then passed on through the chain for use with dailies, etc. 

This method is one of the most common ways of working. It’s not limited to internal ProRes recording either, it’s also commonly used with ARRIRAW.

So when working with the traditional RED workflow, I like to call that a “untethered “ workflow. You aren’t paintboxing the image on a live signal. You shoot something, bring it to the computer, and then process there. All that information is stored within the metadata if you are using redcine x, and if most finishing software can just open up the r3d, and the RMD (metadata) information is right there automatically putting the finishing colorist in a good spot to start with. For other cameras this can be a little more difficult since RED has designed their workflow from the ground up to be the way it is. Passing along color decisions down the whole pipeline untethered  can be done, but not quite as streamlined as dealing with r3d. 

HYBRID VIDEO AND R3D WORKFLOW: WHY AND HOW               

My goal this past year having done so many jobs the tethered way, was to figure out how to accomplish the same thing with working with EPIC. How can we start merging the workflows at the beginning of the chain?

WHY

Why fix it when it’s not broken you may ask? Well to me it’s always been a little broken. Honestly, and I’m sure many can agree with me, it’s tough to get people to run over to your cart to sign off on looks. DP’s are busy on set, Directors as well, and it diminishes client confidence when they look at a monitor, don’t like what they see, but have to force them to run over to the cart to show them what it REALLY will look like for the dailies and the starting point in the finish. Being tethered, that is color correcting a live video signal, keeps everybody on the same page, has everybody look at approximately the same thing and let’s you make adjustments immedietely. Thus affecting lighting decisions right away, compensating when exposure changes, etc . It’s instant and immediate, and I really believe you gain a lot more with this method.

Yes, you can load looks directly into the RED cameras, but you have to do it everytime you make any changes to the LUT. Ths is impractical in application. 

Working on a live signal is just faster and problems that can be solved with lighting are easier to identify. 

HOW

Back when Pomfort was beta testing LiveGrade, a now very popular software for on set live signal color correction, I was going through it and listing things I personally want from the software. One of the suggestions was figuring out a way to come up with Redgamma delog lut so that I can start applying the same workflow I’ve been doing in a “video” tethered workflow, avoiding and bypassing the Redcine X method all together. Originally I said it if we could save RMD’s out of LiveGrade that would be stellar. Unfortunetely that’s a all RED format and no one has their SDK to create these files outside of RED software. But, Pomfort was still paying attention, and in the latest update, they added new preset modes in your delog menu. I saw the variety of cameras in there, Alexa C-Log, Canon Log, S-Log, S-Log2, and then...Redgamma2, Redgamma3.

red_delog.jpg

So immedietely I ran tests, starting outputting redlogfilm from my friend’s Epic, put it through my whole chain of hdlink, livegrade, etc. And starting building cdl for the live image and using the preset of redgamma3, and created dailies from it.

Few disclaimers right now. The delog is built into LiveGrade’s coding, you need to export the delog out without any cdl directly out of LiveGrade to get it as a standard .cube file. This is important because if you simply set the metadata to redgamma 3 in a dailies creation software or even in a finishing color suite, the cdl will come in on top of the delog instead of coming in before it. So you are doing a pre linearization instead of af post linearization, your cdl’s won’t line up.  Another note is that Pomfort’s delog is close to being a stop more crushed in the blacks then compared to the camera, but color values all remain identical. I actually don’t consider this a bad thing either because it forces more light to come into the image to get you out of thse noise floor, and I can always bring it back up if needed since it is just a LUT. But I’ll be talking to Pomfort about getting this more exact.

So I create my cdl, check out my image on the monitor coming from camera going throug LiveGrade, and bring it into Scratch Lab. I set the delog as a grading lut, or you can set it as a output lut. And then load the corresponding CDL file. It lines up perfectly. All the quicktimes I generate, look  exactly as they should.  So now this software combination has merged a r3d workflow into a existing pipepline that never really meshed at all with how we typically work with R3D.

All the finishing colorist has to do now is set all the r3d’s in his timeline to redlog film, set the redgamma 3 delog for the clip, load the cdl, and it will line up perfectly. Exactly the same way as they do with Alexa or any other camera.

This method can be used in a VFX pipeline as well, where you have to make DPX stacks from the R3D. The LUTS can just be applied with no extra work with redlogfilm based DPX files, and  now your color and looks management has been simplified. (Let’s  face it, not everybody can be native R3D all the time. 5k compressed wavelet is way too much for huge some vfx pipelines, you can’t always be native in R3D) On the flips side, we aren’t even deviating from the advantages of RAW either. You can still modify metadata information and anything that has to go DPX for a quicker back and forth with whatever is part of the pipeline, the LUTS will translate all the color decisions throughout.  

So a opportunity came up where I wanted to offer up my services to a production that was doing a short film that had great treatment, high concept and already had people involved that I wanted to work with.  Zina Brown was the director, and had been working on putting a film together called “Dreams of the Last Butterflies”  I’ve seen and have had helped him with some finishing color on some of his work before and really loved the kind of films he made. Producing on this was Ben Cain, and DPing was Timur Civan. The shoot would be fairly fast paced, the crew was small, and I knew that it might get really scattered and I wouldn’t be directly on set all the time. So I decided to take this method and used it for a whole weekend of shooting, and I’d like to think that we got some pretty great results.  

1_log_1.2.1.jpg

redlogfilm

1_gamma_1.2.2.jpg

redgamma 3 delog in LiveGrade

1_look_1.2.3.jpg

with CDL generated in LiveGrade and applied in Scratch Lab.

2_look_1.21.3.jpg

redlogfilm

2_gamma_1.21.1.jpg

delog

2_look_1.21.2.jpg

with CDL

4_log_1.84.3.jpg

redlogfilm

4_gamma_1.84.1.jpg

delog

4_look_1.84.2.jpg

with CDL

5_log_1.100.1.jpg

redlogfilm

5_gamma_1.100.3.jpg

delog

5_look_1.100.2.jpg

with CDL

ADVANTAGES AND DISADVANTAGES

Remember, this is just one way of working, it’s not the best way overall. It’s sometimes not even possible to work constantly tethered. But it’s the way I prefer and feel like I do my best work like this. 

ADVANTAGES

Live decision making, which I find faster and more efficient. Everybody is looking at the same thing. Client confidence. 

Dual monitoring what you have in log and your lut. Seeing your log gives you a lot more info, and helps with color/lighting decisions. You see how much noise is really in your shadows, how close you are or if you are really clipping. Etc. 

You are part of the food chain, yaye! Being able to see what's being shot is essential. You can monitor the image all time and look for issues. I’ve done jobs where because being untethered is so accepted working with RED I haven't been directly on the set and can’t look at this footage until after the fact. If there was a problem, it’s usually way too late. 

Oddly enough, the most important aspect of all of this, and this might just be me. I've had a easier time creating looks via cdl method and delog over bringing r3d’s in, messing around with the tools in RCX and applying looks on top of redgamma 3, or starting fresh with redlog film. The delog sets a great starting point across the board, but when you manipulate color, you are on a CDL level. It’s pre linearization to redgamma. I find that you can a more elegant color adjustment method. It’s nearly the same principle as altering metadata first to get to a good place before you apply color. You zero in on camera iso and color temp, and having cdl betwen the redlogfilm and redgamma, to me, produced better results, faster. And if I”m just doing the color, I don’t need a expensive red rocket to see my sdi signal. It’s right off of camera. So if I’m not doing the dailies than I don’t even need a rocket on set anymore to do color for r3d if I’m going the redcine X route. Which is the only way to pass on rmd information down the food chain if you aren’t doing the dailies. 

DISADVANTAGES

You DO lose your metadata chain with color and now are relying on a lut based workflow. No good for smaller jobs that really don’t know this chain. It’s actually really great you can lace your color directly into the r3d and having it load up as metadata down the line. It locks in perfectly with Da Vinci Resolve and Scratch, As well other color software. 

Altering metadata first before doing color is I think, still a better way to work. It’s non destructive and really robust in how you work with your footage. Counter to that though,  if you have a really fat exposure and nail down the color temp, cdl method can just be as clean. But metadata advantage a valid point, especially if you want to use methods of dialing iso/ flut, fixing color temp, tint, etc. It can still be done with the CDL, it might just not always stay in the chain the way you want to. Not all dailies creation software is guaranteed to maintain the information iso, color temp, tint, etc through the pipeline inside of the r3d. Once you do it in RCX and save it, it stays with it the whole way. You can make those additional alterations as you get the footage in, but it gets back to the, not everybody is seeing on set what’s gonna be showing up in the dailies. 

You can’t put cdl and delog into RCX. RCX is free. Best price in town. So it puts your overhead in your investments higher. I’ve been a die hard Scratch Lab user this past year, and haven’t really used RCX much. You can apply this method in Resolve Lite, but you’ll be limited to HD resolution output only. Limits you in outputting higher res files, and iI’ve been asked on many jobs to output 4k pro res files for VFX as well. Also Resolve isn’t optimized with working with the rocket as fast. Best I got out of resolve with no additional color work with a rocket is about 15 fps or so. When I got 20+ from RCX or Scratch. And the investment in something like livegrade, hdlink, switchers, DA’s... but if you're already doing Alexa or anything else similar. You’ll likely have this stuff already. 

So the biggest disadvantage right here I wanted to save for last. The the current moment you can’t have different gamma outputs from your sdi to your onboard EVF or Touchscreen LCD on a RED. Doing “Dreams of the Last Butterflies”, the entire piece was shot on a AR rig. I monitored via Boxx wireless and did everything like that. The operator didn’t need redgamma on his monitor cause he just needed something to frame. So key point RIGHT NOW, is you can’t really use this method everyday. I’ve been lobbying to RED to let you set redgamma on the onboard screens, and redlogfilm on the sdi and hdmi independently. 

CONCLUSION

I’ll probably be doing the finishing color for “Dreams of the Last Butterflies”, and loading the delog LUT and cdl is going to simplify the process for me. It will go through a flame artist for a beauty pass and a few compositing shots, and I know that this method is just going make things easier. All I have to do is load in the LUTS, tweak what I need to for better matching if I didn’t do a good enough of a job the first time around, and a few secondaries on the footage to sweeten it up. The flame artists can load DPX log files and the LUT’s I made and versioning with that will look identical to the dailies. 

Is this workflow for everybody? Of course not. It's just another way you can work. Until RED offers up independent gamma selection for your signal outputs, this method hasn’t come to full fruition. But the combination of LiveGrade and Scratch Lab has opened up the potential for working with the camera in a more traditional way. Hopefully this functionality wlll end up on the next firmware release. 

Syncing Audio in Resolve 9 Lite

Syncing Audio in Resolve 9 Lite

Happy Sunday. It's a beautiful one here in NY so can't wait to get on the bike. That said, this will be quick.

Whenever I spend an aggravating amount of time trying to figure something out, I feel that it's a worthy topic for a blog post. I've been checking out the Resolve 9 Lite Beta and couldn't figure out for the the life of me how to sync audio. Couldn't find any decent tutorials or workflow guides online or on the BMD forums. After enough "right clicking" I finally found it. 

From the top -

1 Download Resolve 9 Lite >>>

2 Create your project and set it up according to your camera media specs.

3 In MEDIA, load your camera files along with the corresponding sound files. It helps to make a bin for both in the Media Pool window, like "Picture" and "Sound".

media1.jpg
media_pool.jpg

4 In CONFORM, create a new Timeline and call it something like SYNCED or you can use the Camera Roll Number. Whatever works for you really. 

conform1.jpg

Now select the Bins for Audio and Video in the Media Pool and RIGHT CLICK on the Timeline you just created. Select "Link With Audio From Selected Bins". A prompt will come up confirming your selections. Click OK. 

conform2.jpg

5 You can confirm that you now have sync sound on your video clips by scrubbing through the timeline.

sound1.jpg
sound2.jpg

For now there is no way to sync audio without synchronous timecode and no way to slip in the event of drift. That's a problem but one that I'm sure will be addressed. Another problem is that this only works with truly MOS video clips. If there are audio channels in the ProRes Files (or whatever), even if they don't actually contain any sound, Resolve will not overwrite these channels with new ones.

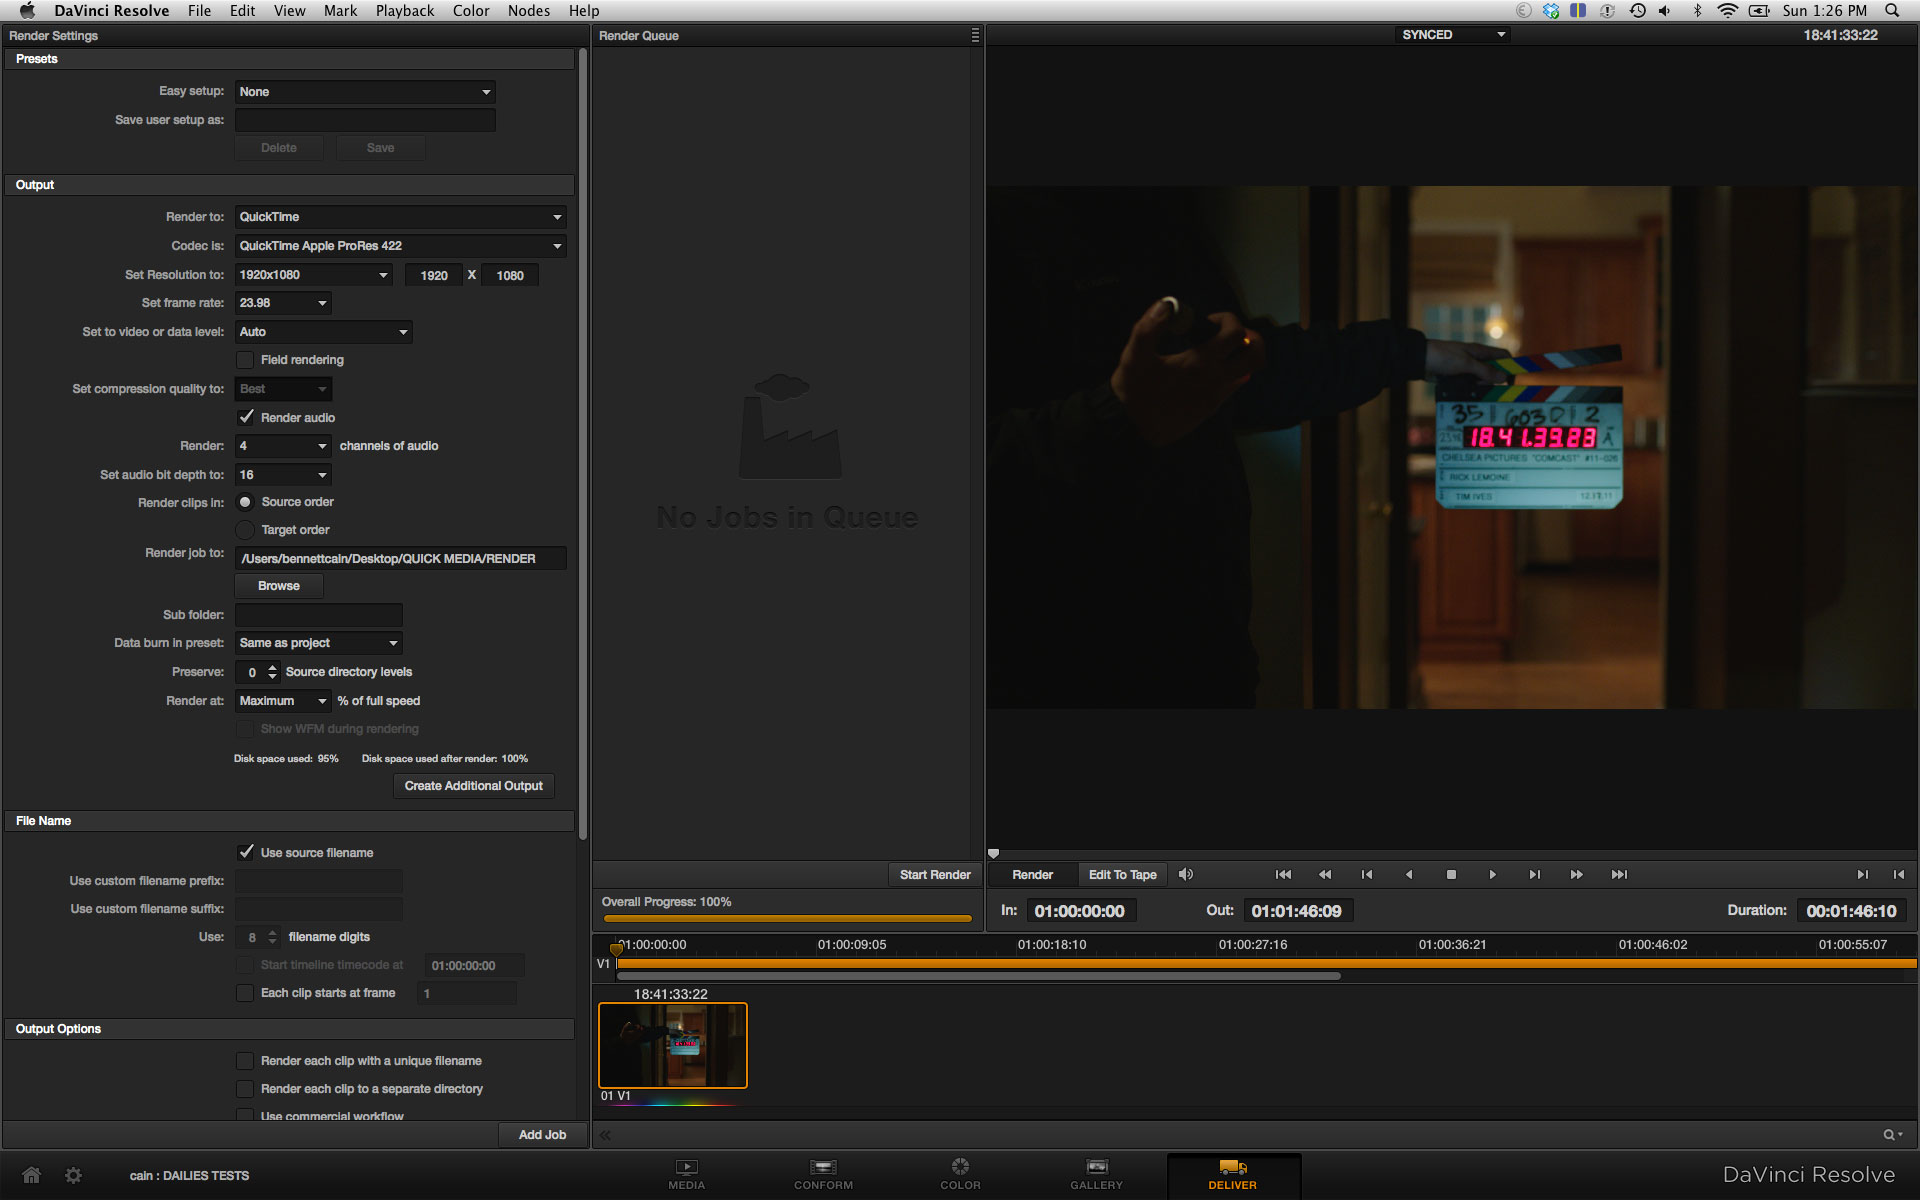
6 In DELIVER, make sure to select "Render Audio" in Output and select however many channels.

render_screen.jpg
render_audio.jpg

There you have it - Color Corrected, Sync Sound Dailies. For free software, this is a pretty powerful solution for HD deliverables. I'm not going to get into a bunch of software comparisons / pros and cons right this moment but I do think with Lite you get an awful lot of BANG for your "No Buck". Hard to argue with that.